Tuesday 7 April 2015

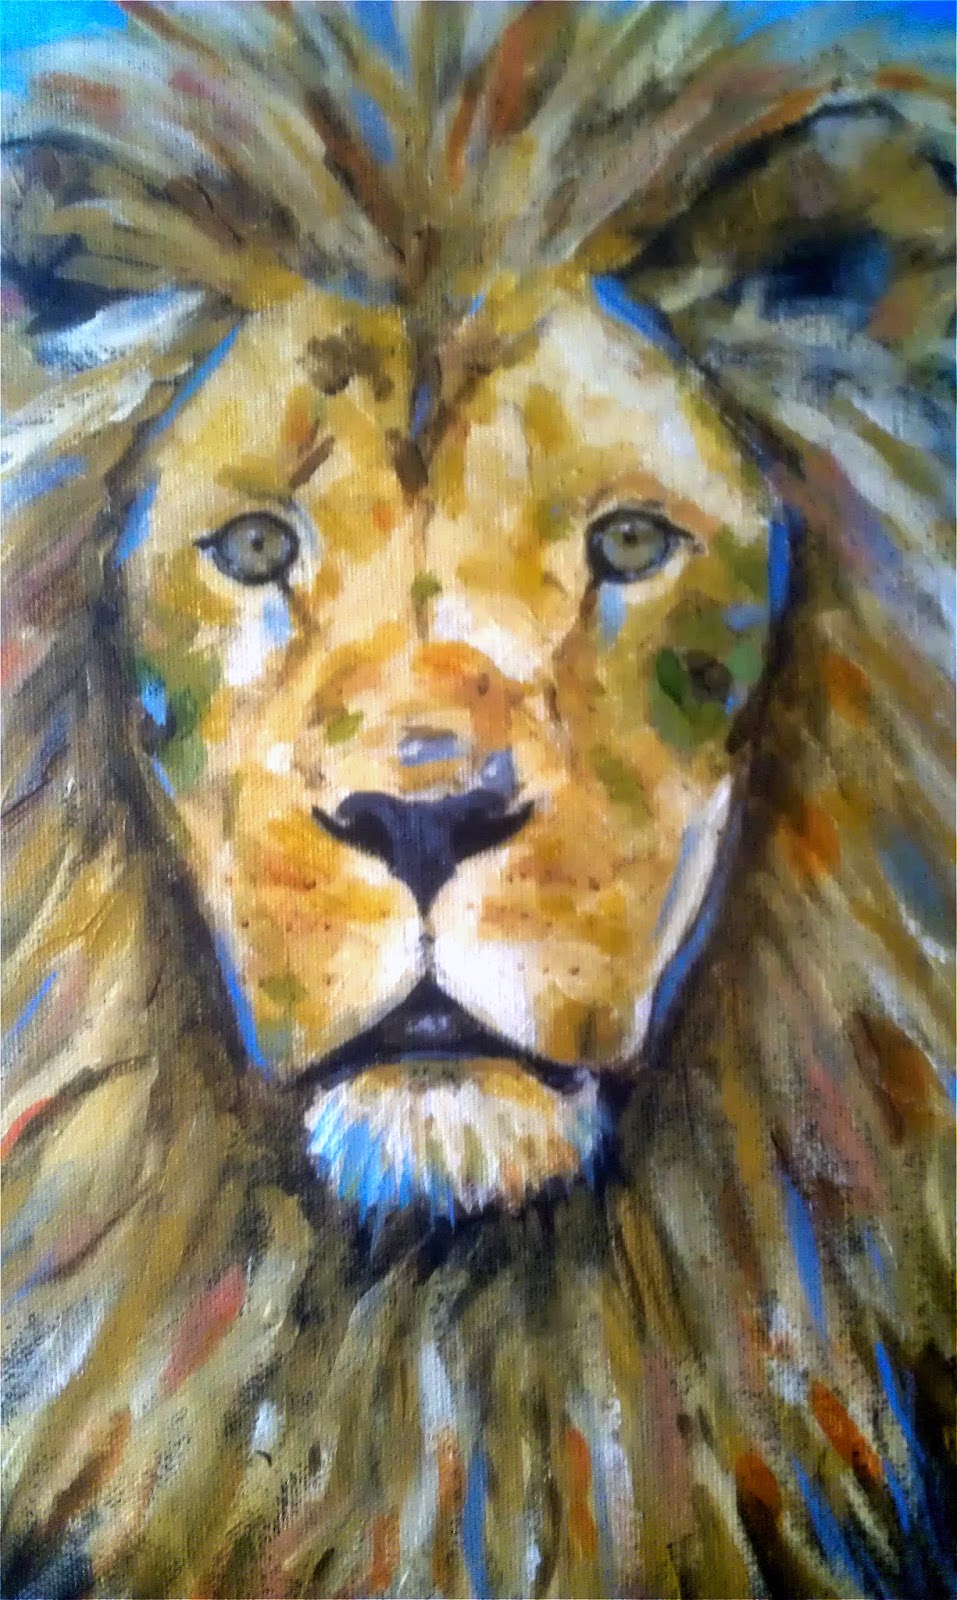
How-to Paint a Portrait of a Lion 

Materials I used:

Photo of a Lion

Canvas Board
Flat Brushes 
Liner Brush

Acrylic Colours (I used WN Galeria)

Titanium White  Yellow Ochre
Sap Green 
Cerulean Blue
Raw Umber
Raw Sienna 
Vermilion (Red) Hue
Cadmium Yellow
Mars Black 

Medium used: Fluid Retarder


Stage 1


Using Raw Umber and lots of water I created a sketch of the lions head on the canvas board. 

If your feeling a little unsure how to start something like this (or where to start) just pick a place and start there. I started with the right eye. I literally blobbed some thin paint there and then where the other eye should be then I worked my way out. 

You can use a ruler or you can hold your brush out to create measurements of the head. I used both methods. And I am always looking at the relationships between each aspect of the head. 

Stage 2


Now I mix the eye colour using Yellow Ochre and a small dot or two of Sap Green. Then I split it into half and add a small amount of white into one pile. And I Paint the dark area of the eyes first and with the light areas I use the  lighter pile of colour. I didn't blend the colours I just put them next to each other. 

Then using Mars black I paint in all the darkest bits. As pictured. 


Stage 3  


This time I start building up the colours of the face of our grand Lion. 

I use Yellow Ochre with a touch of white and pick out the lightest areas of the face, like around the mouth and on the nose. Then I go into some pure Yellow Ochre and add it to the Lions cheeks. Then with Some Yellow Ochre and a bit of white I work around the head. 

I then start going between the three values and place the colours on with simple strokes. (I don't scrub the colour on). I try to make each stroke of colour count. 

Stage 4


This was the point I thought I would add more colour than I can see. Colours that I felt could be exaggerated I did. 

I used Sap Green on the cheeks and some Raw sienna here and there to warm certain areas up. I also added some more strokes of light and pure Yellow Ochre here and there. 

And I added the Lions beard with some leftover light Yellow Ochre.


Stage 5


I now add in the highlights on the eyes using some mixed Mars Black and White. And using pure mars black I make the eyes smoother and I use a thin raw umber on the darker areas of the eyes to create more realistic eyes. 

I then darken around the head to see the shape of the head clearer and make it easier to correct if needed. 

I am constantly correcting areas I don't feel are quite right. Refining all the time. Remember to sit back and look at the whole picture as you create it. 

Stage 6


I now work quite quickly and use Cerulean Blue and White and using criss cross strokes I loosely put in the background. I don't blend this just lay on the paint. After that dries I get Raw Umber on the brush and add the mane. When that dries I paint in the ears using Yellow Ochre I blend the yellow into the Raw Umber as it gets closer to the Lions Ear hole.  

I also add the tongue using a bit of Mars Black and White, and a lighter version for the highlight of the tongue. 


Stage 7


This is where I use pure colour around the face picking out warm and cold areas and expressing them with colour. 

Blue is sent backwards and reds are brought forwards. 

I then add the mane using various mixtures of Yellow Ochre and white. Then when thats dry I go over it again using pure yellow Ochre in places and pure Raw Sienna. Then I go in again with Blues and Reds. I made sure my blue was lightened slightly with white and my red was turned orange slightly with Cad Yellow. This is a time to be expressive. Don't forget if you don't like a colour in a certain place you can paint over it using another colour. That's the beauty of fast drying paints. 

Final Stage

Paint the lighter areas of the nose. Paint in the whiskers and add in the highlights on the eyes. 

Any area you missed this is the time to complete the painting. 

I hope this little guide gives you an idea on how to paint a Lion using acrylics. 


Wednesday 21 September 2011

New Painting for YouTube Show

I have been thinking about what painting I should demonstrate next on my YouTube channel: j123wb.

When I first started painting in the wet-on-wet technique of painting I was fascinated with the way artists were able to give the impression of moving water with just a few brush strokes... this made me amazed and extremely excited as I thought I could achieve the exact same effect myself. Well I could after a bit of practice (and frustrations I might add).

So what I should do is a show on how-to create the moving water effects in the form of a waterfall next. What I found when I painted a waterfall the paint just mushed together and that movement was lost and it was all because of the amount of pressure I fed the brushes bristles on the canvas. A thin paint and a light stroke is key to get that waterfall effect in this technique. On the picture below you can see a clean directional line which gives the impression water is running along that line and crashing below.

What I plan to do is a version of a giant painted I did where lots of waterfalls cascade down a mountain side and join up to make one monster fall... I will have to scale it down a bit but should get the technique across using this painting for the the show.

Written By: Jason Bowen


Monday 19 September 2011

New Oil Painting Lesson updated!

After a few false starts with my introduction speech I finally got under way... I decided I was going to paint a blue sky with a few clouds and a nice easy mountain, the rest was going to take shape as I painted it. I find if you have a basic idea of what you want you can just go with it and allow your painting to develop itself.

I am glad I managed to get the painting done within 40 mins I was aiming for 30 but was painting on guess work, maybe a large clock would be useful next time.

The image below is of my old trusty Sony Handycam. I have had it a while now but it has become a friend over the years I would feel guilty up grading. Maybe when I do I will keep it as a back-up.

Tuesday 13 September 2011

Brushes and Knifes

I have been preparing my equipment needed for the first episode of the landscape painting show. Below is a picture of the equipment that I will be using.

Probably my favourite two pieces of Bob Ross art supplies is the 2 inch brush and the detail knife. I love doing trees and bushes with just the 2 inch brush (especially in front of a crowd), its amazing the detail you can create with such a big brush. And what I love about the Bob Ross detail knife is the way you can do some incredible mountains with lots of peaks and of course detail.

I personally took to the knifes almost straight away. But for a while I struggled to do bushes, and that was simply because I wasn't using enough paint, a common mistake I have found (phew). What I did was set up a huge canvas and just fill it full of bushes until I got the right amount of paint on and became more sensitive to the right feel you need to allow the paint to just leave the brush and creat a lacey effect. I just hope I get it right when the cameras rolling...

My magic brushes!

by: Jason Bowen                                                                                                                                         

Monday 12 September 2011

New Oil Painting Show

I have cleaned the lenses and bought a new tape for my video camera as this Friday I shall be making a new 30 minute how-to video! I shall be doing a painting in each 30 minute show explaining the wet-on-wet technique made popular by Bill Alexander and Bob Ross.

I will be showing new paintings and hopefully projecting how easy it is to do a painting using this fantastic simple technique. Known as the lazy mans way of painting...  with a bit of practice and a few colours and brushes you can create beautiful paintings in a matter of minutes.

I hope to keep alive this fantastic technique and hopefully allow people to learn to paint in there own front room... well at least where ever there computer screen is situated.

Also I will be open to suggestions on what you want to see painted and hopefully I can show how.

I have been teaching this technique on the road and have been asked many time to make DVDs or post full lessons on YouTube.

YouTube is where you will find the How-To show under the channel name j123wb. I will hopefully be posting the first episode on the 17th September.

Check it out should be good (I hope)

by: Jason Bowen